Grading up the Washi Dress pattern to a larger size
The Made By Rae Washi Dress is one of our best-selling patterns at The Drapery. It's a flattering style for a great range of shapes, sizes and ages and can be made up in many different fabrics.

But what if you are outside the pattern's size range? The most important measurements with the Washi Dress are Upper Bust and Bust (full bust). The largest size - XXL - accommodates a 40 - 41" Upper Bust and 42 - 44" Bust.
Here we show you how to grade the Washi Dress pattern up.
Our example is for an Upper Bust of around 43-44" and Bust around 45 - 46".
First we made a basic muslin of the bodice in the XXL to check fit on our Washi recipient, and see how much more room was needed. (Old Ikea pillowcase = perfect muslin fabric!)

The back of the Washi Dress is cut all in once piece - bodice and skirt - so to make a muslin of just the bodice you will need to cut your pattern piece, or fold the skirt part out of the way, or trace off a separate bodice-only pattern. The side seam on your back bodice piece will need to be the same length as the side seam on your front bodice piece, once the bust dart is sewn.
When our Washi model tried the muslin on, the actual shape was good but it was a very firm fit all over, with no room at all for gathering with the back shirring. We estimated around 3 - 5" increase in the bodice width would provide her with a comfortable fit plus room to move with the back shirring. The bust dart sat too high (ideally the bust dart should sit just below and point up towards the bust apex). The bodice also needed extra length.
To grade the pattern up, we used this very helpful information found at the blog Elegant Musings. Please bear in mind we are not trained pattern-makers so we are just sharing what worked for us. Besides, if we can do it, you probably can too!
To put it simply, the bodice pattern pieces need to be cut and spread at each critical section of the bodice: armhole, shoulder and neckline. We also wanted to lengthen the bodice, so we cut horizontally and spread downwards too.
Start with your traced-off front bodice pattern piece. Place it on a larger piece of paper.
 Use a ruler to draw in your cut-and-spread lines top-to-bottom at armhole, shoulder and neckline. Since, in our case, we also wanted to add length and lower the bust dart, we have added a horizontal cut line above the bust dart.
 Cut your pattern along the lines and spread the pieces apart evenly. We have added 1cm width at each of the vertical lines and 4cm in length at the horizontal cut line. Tape the pieces down to the backing paper.
 Connect and re-draw your edge lines, smoothing out where necessary. To keep the bust dart the same size, we have shifted the end point 1cm to the left, as you can see below.
 Cut out your new pattern piece! (Wow, that's one grubby cutting mat.)
 You will need to repeat the process with your back bodice pattern piece.

We added 1cm at 3 points on the front and back pattern pieces, which are both cut on the fold. Therefore in total we have added a total of 12cm (almost 5 inches) to the entire bodice measurement.
We then made a muslin of the graded-up bodice to check the fit. It was great! We simply decided to add an extra 1cm in the length adjustment (making a total of 5cm added horizontally above the bust dart).

Below you can see the original muslin laid on top of the graded up muslin.

The width adjustments then need to be added to the skirt pattern pieces. Since the skirt shape is very simple, we didn't need to make multiple cuts. In the front, to preserve the position of the pleats, we cut and added width between the outer pleat and the side seam. In the back, we simply added 3cm at the middle fold line.


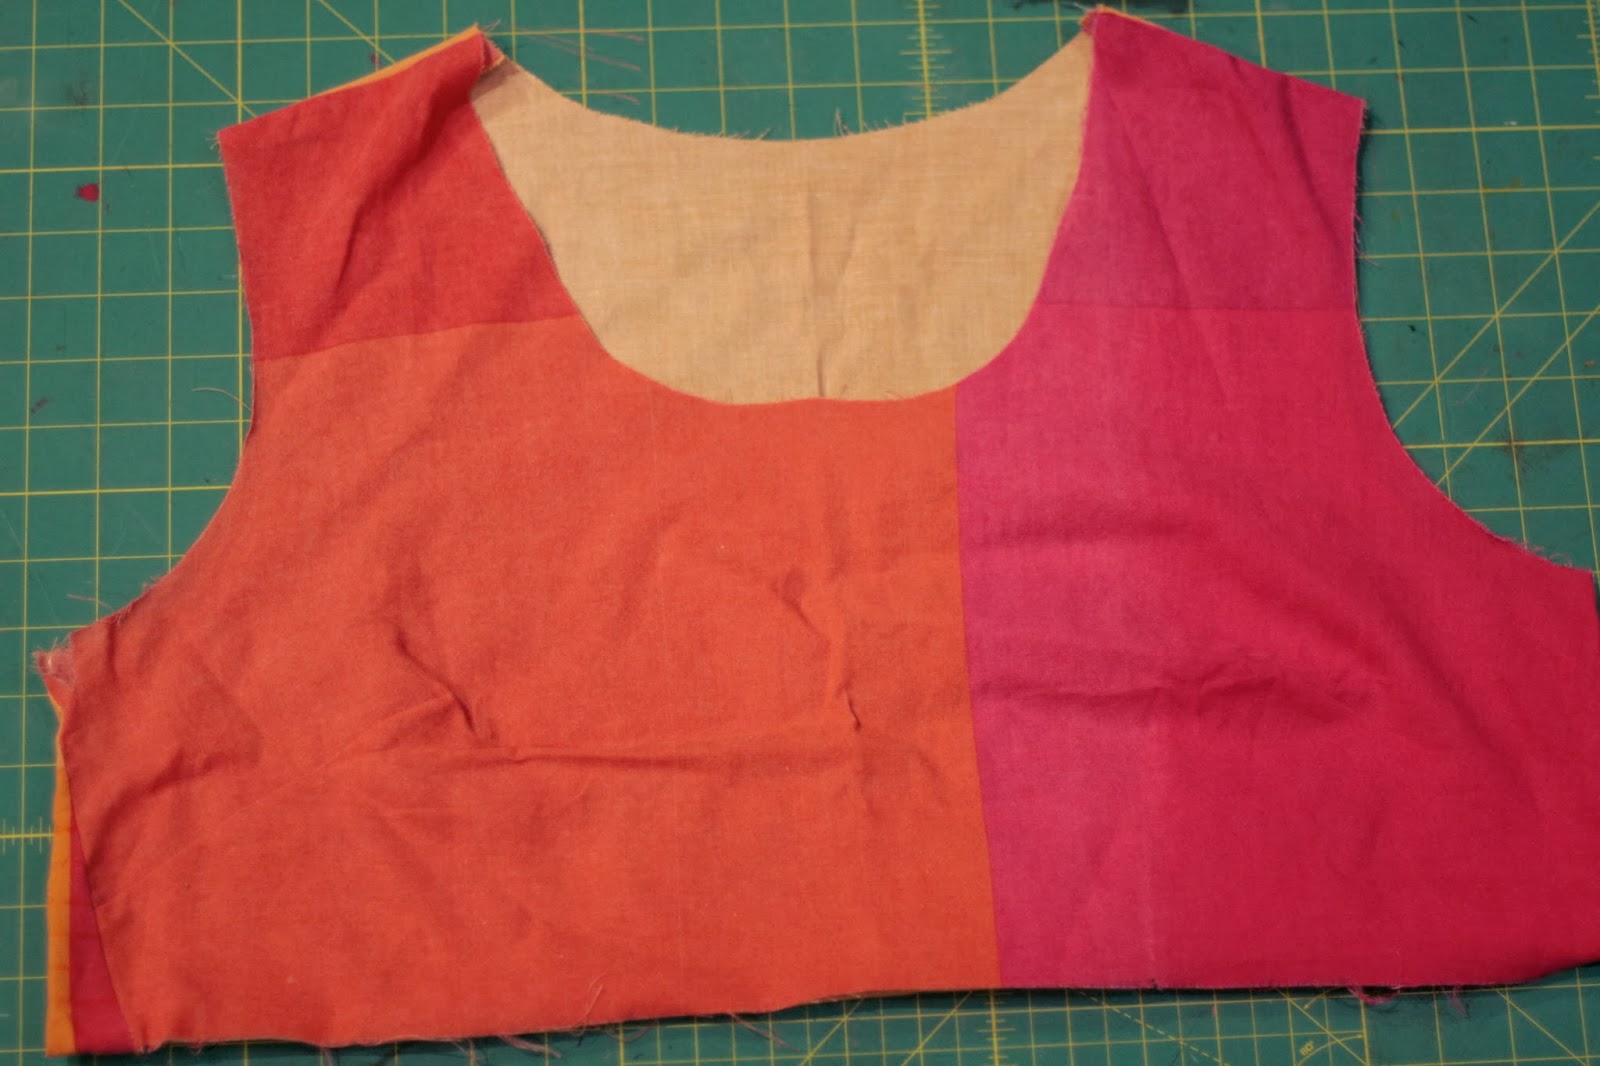
If you are using all the one fabric for your Washi Dress you can then join your back bodice and skirt pattern pieces back together and cut the back all as one. We chose to make the bodice and skirt in different fabrics, so added an extra inch to the top of the skirt piece to make up the length of two 1/2 inch seam allowances at the back join.
Don't forget to also add width to your neckline facing pieces to correspond to the width you added at the bodice neckline.

And here we see the graded-up Washi Dress on its happy recipient (Jane's sister-in-law)!
 Instead of shirring in the back of the dress, we made elastic casings by sewing wide bias tape on the inside along the shirring lines. We inserted 2 lengths of 1/2" elastic, so it was easy to get the right fit by adjusting the elastic. It will probably also be more durable than fine shirring elastic, for the wear and hand-washing that this dress will see when lovely sister-in-law is back home in Uganda. (Fabrics also from Uganda.)

Going through this process has certainly unlocked some of the mysteries of pattern grading for us. We hope you've found it helpful too.
- Jane & Fiona xx

But what if you are outside the pattern's size range? The most important measurements with the Washi Dress are Upper Bust and Bust (full bust). The largest size - XXL - accommodates a 40 - 41" Upper Bust and 42 - 44" Bust.
Here we show you how to grade the Washi Dress pattern up.
Our example is for an Upper Bust of around 43-44" and Bust around 45 - 46".
First we made a basic muslin of the bodice in the XXL to check fit on our Washi recipient, and see how much more room was needed. (Old Ikea pillowcase = perfect muslin fabric!)
The back of the Washi Dress is cut all in once piece - bodice and skirt - so to make a muslin of just the bodice you will need to cut your pattern piece, or fold the skirt part out of the way, or trace off a separate bodice-only pattern. The side seam on your back bodice piece will need to be the same length as the side seam on your front bodice piece, once the bust dart is sewn.
When our Washi model tried the muslin on, the actual shape was good but it was a very firm fit all over, with no room at all for gathering with the back shirring. We estimated around 3 - 5" increase in the bodice width would provide her with a comfortable fit plus room to move with the back shirring. The bust dart sat too high (ideally the bust dart should sit just below and point up towards the bust apex). The bodice also needed extra length.
To grade the pattern up, we used this very helpful information found at the blog Elegant Musings. Please bear in mind we are not trained pattern-makers so we are just sharing what worked for us. Besides, if we can do it, you probably can too!
To put it simply, the bodice pattern pieces need to be cut and spread at each critical section of the bodice: armhole, shoulder and neckline. We also wanted to lengthen the bodice, so we cut horizontally and spread downwards too.
Start with your traced-off front bodice pattern piece. Place it on a larger piece of paper.


We added 1cm at 3 points on the front and back pattern pieces, which are both cut on the fold. Therefore in total we have added a total of 12cm (almost 5 inches) to the entire bodice measurement.
We then made a muslin of the graded-up bodice to check the fit. It was great! We simply decided to add an extra 1cm in the length adjustment (making a total of 5cm added horizontally above the bust dart).

Below you can see the original muslin laid on top of the graded up muslin.

The width adjustments then need to be added to the skirt pattern pieces. Since the skirt shape is very simple, we didn't need to make multiple cuts. In the front, to preserve the position of the pleats, we cut and added width between the outer pleat and the side seam. In the back, we simply added 3cm at the middle fold line.


If you are using all the one fabric for your Washi Dress you can then join your back bodice and skirt pattern pieces back together and cut the back all as one. We chose to make the bodice and skirt in different fabrics, so added an extra inch to the top of the skirt piece to make up the length of two 1/2 inch seam allowances at the back join.
Don't forget to also add width to your neckline facing pieces to correspond to the width you added at the bodice neckline.

And here we see the graded-up Washi Dress on its happy recipient (Jane's sister-in-law)!


Going through this process has certainly unlocked some of the mysteries of pattern grading for us. We hope you've found it helpful too.
- Jane & Fiona xx


You did a great job.
ReplyDeleteWell done.
PS Finally found your shop the other day, Hugo spotted it as we were driving past. I can't wait to pop in.
Thank you! And we would love you to drop in one day :)
DeleteThis has been so helpful to me thankyou for all the detail and pictures too
ReplyDeleteOh we really appreciate the feedback, thanks Ruth!
DeleteThis is great. Thanks for showing all the steps. definitely demystifies the process.
ReplyDeleteThis is great. Thanks for showing all the steps. definitely demystifies the process.
ReplyDelete